Open topic with navigation
Custom Content
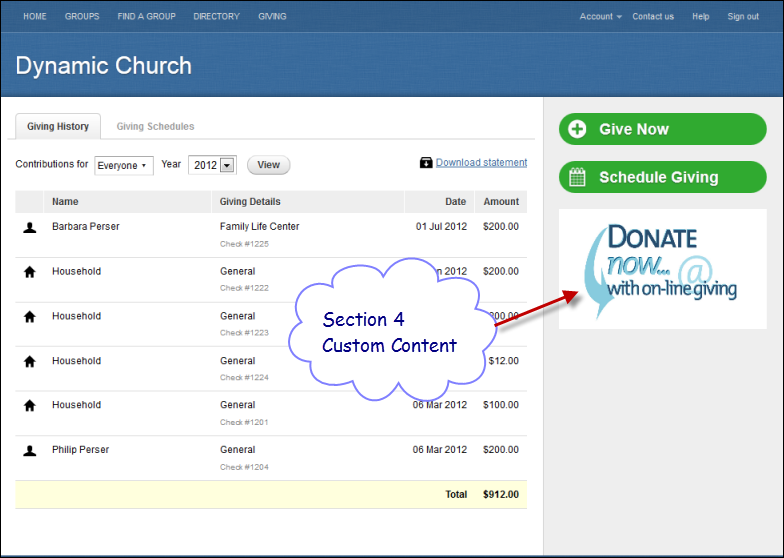
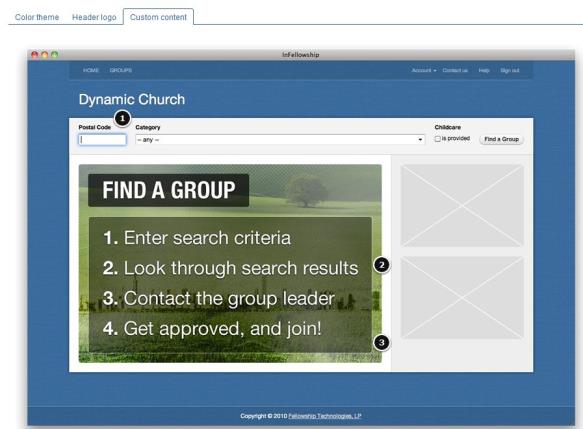
You can brand the InFellowship application in a few different ways including the content that displays in the application. As shown in the following image, you can control content in areas 1, 2, and 3 in InFellowship Groups. There is a 4th area where you can add a file with will appear on the Giving History or Giving Schedule pages.
The default graphic for area 1 (the larger area below) is simple directions. Areas 2 and 3 at the bottom are always available no matter what feature the end user is working with. By default, these boxes display nothing.
 Custom Content for InFellowship Groups
To create custom content:
- Click Weblink> InFellowship> Branding. The color theme selection screen appears.
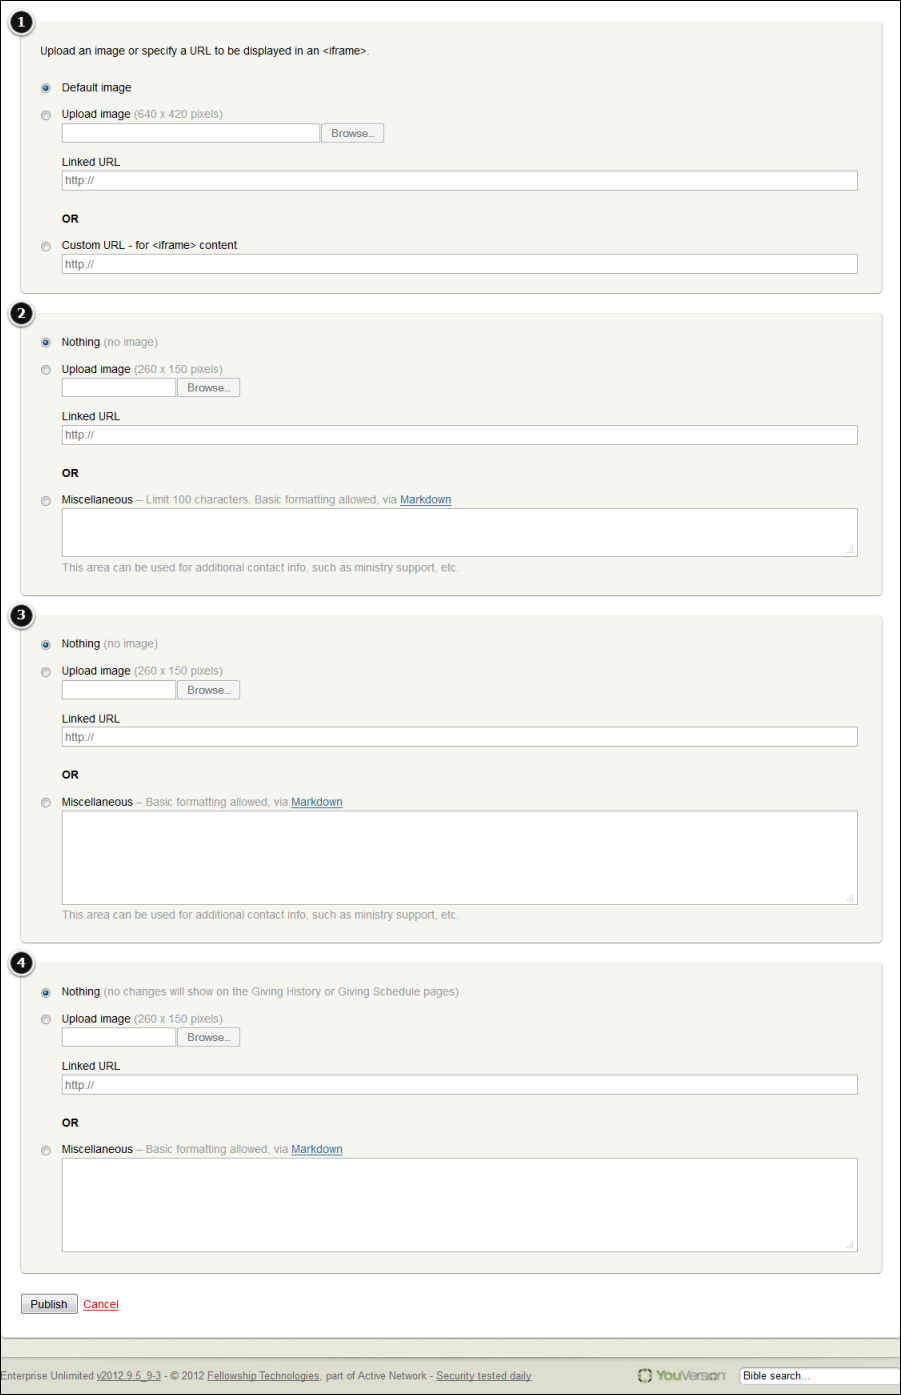
- Click Custom content in the Branding options on the right side of the screen. The Custom Content form appears. Consult the image at the top of the page for reference.
- In area 1, select one of the following:
- Default image—this option displays the image shown below when people choose to find a group.
- Upload image—allows you to find and select an image file on your computer (this file needs to be 640 pixels wide x 420 pixels high) or you can link to a file that is 640 x 420 pixels on a public facing web server. Simply type the complete web address for the image in the Linked URL field.
- Linked URL- this option lets you embed an image using a link to it's URL.
- Custom URL – for <iframe> content—allows you to enter a complete web address for an HTML file you have created and saved on a public facing web server. Your content will appear in a 640 x 420 pixel iframe.
- In area 2, select one of the following:
- Nothing (no image).
- Upload image—this options allows you to locate and select an image file on your computer. This file should be no larger than 260 pixels wide by 150 pixels high. Alternatively, you can link to a file that is 260 x 150 pixels on a public facing web server. Simply type the complete web address for the image in the Linked URL field.
- Linked URL- this option lets you embed an image using a link to it's URL.
- Miscellaneous—this option allows you to type some text and apply simple formatting instead of showing a logo file. To see the formatting options, click the link.
- In area 3, select one of the following:
- Nothing (no image).
- Upload image—this options allows you to locate and select an image file on your computer. This file should be no larger than 260 pixels wide by 150 pixels high. Alternatively, you can link to a file that is 260 x 150 pixels on a public facing web server. Simply type the complete web address for the image in the Linked URL field.
- Linked URL- this option lets you embed an image using a link to it's URL.
- Miscellaneous—this option allows you to type some text and apply simple formatting instead of showing a logo file. To see the formatting options, click the link.
- In area 4, select one of the following:
- Nothing—(no changes will show on the Giving History or Giving Schedule pages).
- Upload image—this options allows you to locate and select an image file on your computer. This file should be no larger than 260 pixels wide by 150 pixels high. Alternatively, you can link to a file that is 260 x 150 pixels on a public facing web server. Simply type the complete web address for the image in the Linked URL field.
- Miscellaneous—this option allows you to type some text and apply simple formatting instead of showing a logo file. To see the formatting options, click the Markdown link.
View Area Map
View screen for Giving History or Giving Schedule (Custom Content Section 4)